본 포스트는 비주얼 스튜디오 코드로 작성한 프로젝트를 깃헙에 업로드 하는 방법을 설명합니다.

VSCode에서 작성한 프로젝트는 아래 방법으로 Github에 업로드해서 공동 작업을 할 수 있습니다.
1. 프로젝트 생성
일단 여기서는 간단하게 React 라이브러리만 하나 설치해서 업로드 해보겠습니다. 먼저 프로젝트 폴더를 하나 만듭니다.
D:\workspace> mkdir testPrj
2. 프로젝트 초기화 및 React 모듈 설치
yarn init -y 명령으로 프로젝트를 초기화하고 React 모듈만 하나 설치합니다.
D:\workspace> cd testPrj
D:\workspace\testPrj> yarn init -y
yarn init v1.22.17
warning The yes flag has been set. This will automatically answer yes to all questions, which may have security implications.
success Saved package.json
Done in 0.04s.

D:\workspace\testPrj> yarn add react
yarn add v1.22.17
info No lockfile found.
[1/4] Resolving packages...
[2/4] Fetching packages...
[3/4] Linking dependencies...
[4/4] Building fresh packages...
success Saved lockfile.
warning Your current version of Yarn is out of date. The latest version is "1.22.19", while you're on "1.22.17".
info To upgrade, run the following command:
$ curl --compressed -o- -L https://yarnpkg.com/install.sh | bash
success Saved 3 new dependencies.
info Direct dependencies
└─ react@18.2.0
info All dependencies
├─ js-tokens@4.0.0
├─ loose-envify@1.4.0
└─ react@18.2.0
Done in 1.12s.
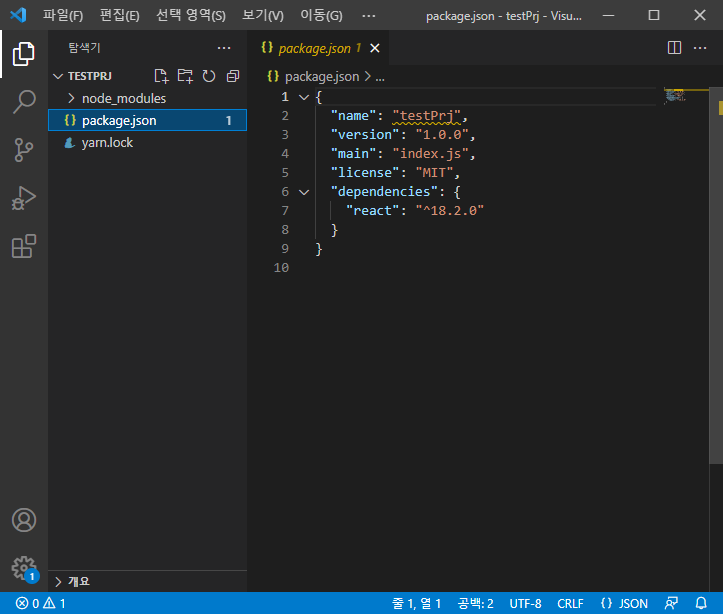
3. VSCode로 프로젝트 반입
생성한 프로젝트를 VSCode로 반입합니다.
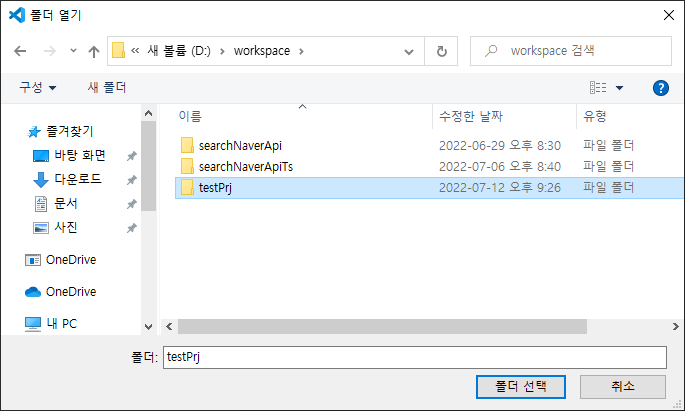
위의 과정을 거치면 아래와 같이 프로젝트가 반입됩니다.
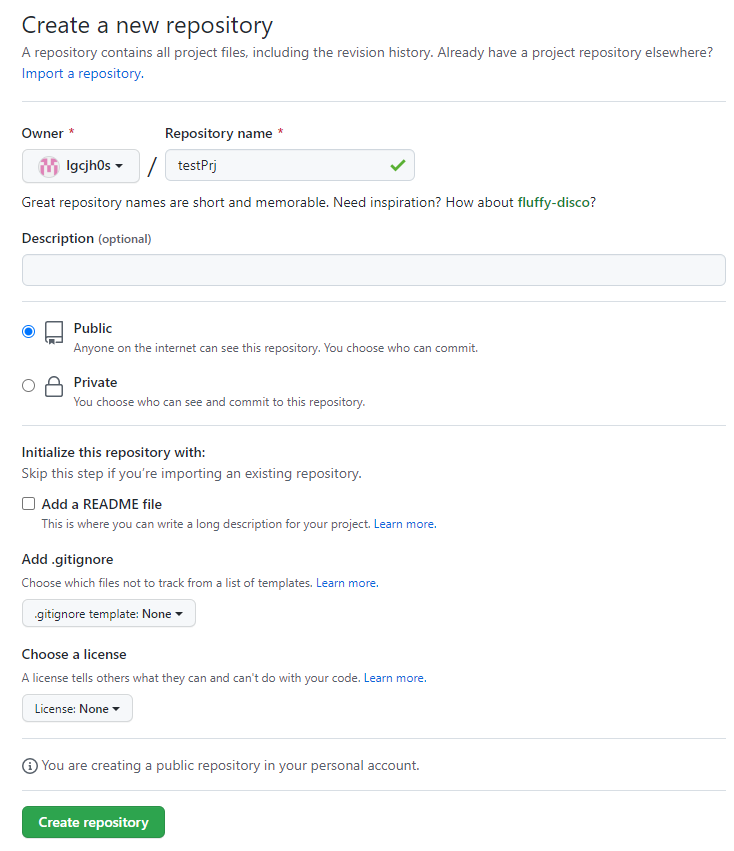
4. Github에 Repository 생성
Github에 로그인하여 [New] 버튼을 선택하여 Repository를 생성합니다.

Repository 생성 화면은 아래와 같습니다. Repository 명은 현재 계정에서 유니크해야 하며, 체크해서 정상이면 초록색으로 체크가 표시됩니다.
Anonymous 접근을 허용하려면 Public, 아니면 Private을 선택합니다. 일단 여기서는 Public으로 생성해 보겠습니다. 입력을 완료하면 [Create Repository] 버튼을 선택합니다.
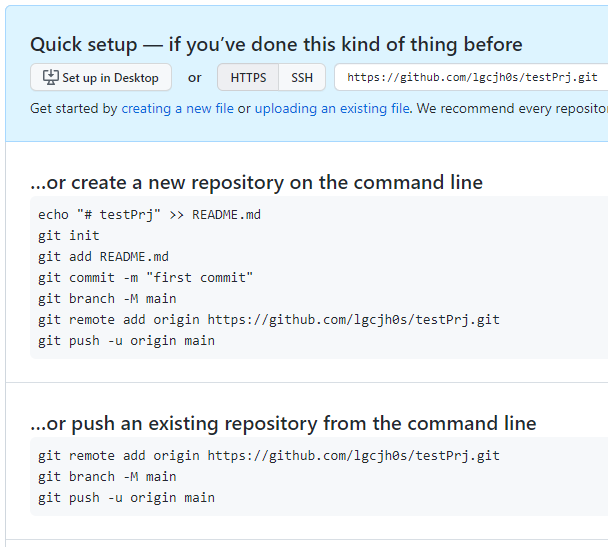
Repository 생성을 완료하면 아래와 같은 화면이 표시됩니다.
5. gitignore 파일 생성
다시 VSCode로 돌아와서 프로젝트 루트에 .gitignore 파일을 생성합니다. 없어도 되지만 대표적으로 node_modules 같은 경로는 굳이 Github을 통해서 공유할 필요도 없고, 파일 전송에 오랜 시간이 소요됩니다. 이렇게 Github에 공유할 필요가 없는 경로를 구분하기 위해 .gitignore 파일을 사용합니다.
대강 샘플 양식은 아래와 같습니다. node_modules 하위나 dist 하위, vscode 설정 파일 등을 제외합니다.
# Created by https://www.toptal.com/developers/gitignore/api/visualstudiocode
# Edit at https://www.toptal.com/developers/gitignore?templates=visualstudiocode

### VisualStudioCode ###
.vscode/*
!.vscode/settings.json
!.vscode/tasks.json
!.vscode/launch.json
!.vscode/extensions.json
*.code-workspace

# Local History for Visual Studio Code
.history/

### VisualStudioCode Patch ###
# Ignore all local history of files
.history
.ionide

# Support for Project snippet scope
!.vscode/*.code-snippets

# nodejs
node_modules
dist/*
build/*
*.log
.DS_Store
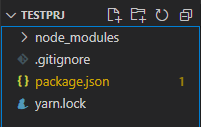
여기서는 다 필요는 없지만 위의 내용을 .gitignore 파일로 저장하겠습니다. 저장하면 현재 폴더 구조는 아래와 같습니다.
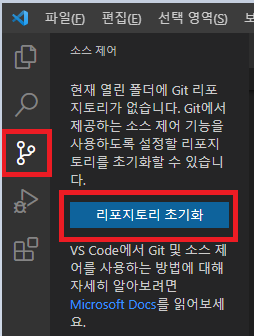
6. Repository 초기화 및 원격 저장소 전송
되도록 UI를 기준으로 설명하겠습니다. 먼저 VSCode의 소스 제어 탭으로 이동하여 [리포지토리 초기화]를 선택합니다.
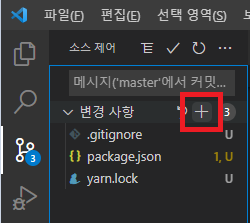
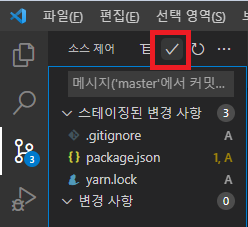
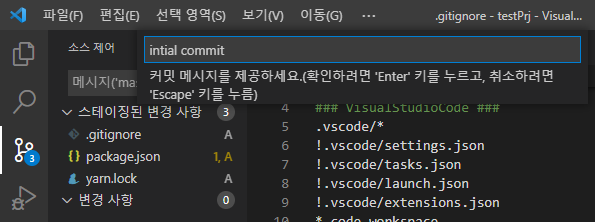
모든 파일을 스테이징에 반영하고, commit 합니다.
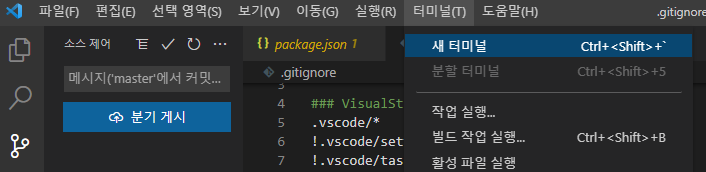
터미널 > 새 터미널 을 선택하여 터미널을 하나 엽니다.
아까 Repository를 생성할 때 나왔던 원격 저장소 추가 명령어를 Copy & Paste 합니다.
D:\workspace\testPrj> git remote add origin https://github.com/lgcjh0s/testPrj.git
이제 원격 저장소로 파일을 전송하면 아래와 같은 형식의 메시지가 표시됩니다.
D:\workspace\testPrj> git push origin master
Enumerating objects: 5, done.
Counting objects: 100% (5/5), done.
Delta compression using up to 12 threads
Compressing objects: 100% (5/5), done.
Writing objects: 100% (5/5), 1.25 KiB | 1.25 MiB/s, done.
Total 5 (delta 0), reused 0 (delta 0), pack-reused 0
To https://github.com/lgcjh0s/testPrj.git
 * [new branch]      master -> master
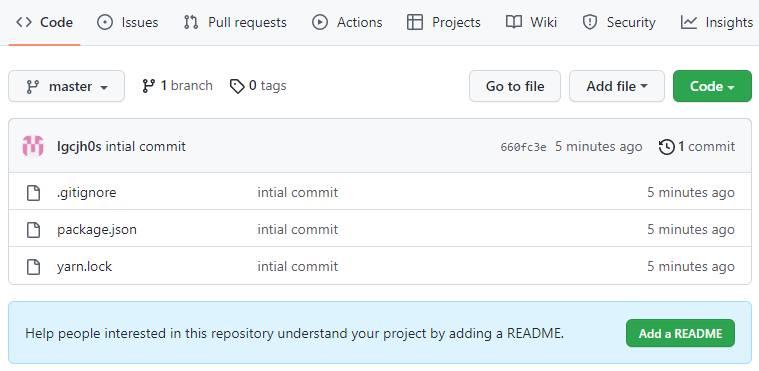
이제 Github으로 가서 원격 저장소에 파일이 적용되었는지 확인해 보면, 아래와 같은 Repository를 확인할 수 있습니다.
'기타' 카테고리의 다른 글
| [사이드 프로젝트] 로또 통계 분석 기반 자동번호 생성 앱 (0) | 2022.11.08 |
|---|---|
| 조건문에서 Arrays.asList, contains 사용하기 (0) | 2022.09.06 |
| Lighthouse 성능 분석 및 WebP 이미지 사용해보기 (0) | 2022.08.02 |
| kakao AdFit 수익 분석 (1) | 2022.07.18 |
| Github 프로젝트 VSCode로 Checkout 하기 (0) | 2022.07.13 |